BIM compositions
Commands
BLCOMPOSITIONS, BIMCLASSIFY, BLMATERIALS, BIMATTACHCOMPOSITION
About
- Are stored in the central database.
- Are either multi-ply or single-ply.
Ply materials are managed in the Physical Materials dialog box (
 ).
). - Can be assigned to any solid in a BIM model.
- Are listed in the BIM Compositions panel (
 ).
). - Are managed in the Compositions dialog box (
 ).
).
For more information about attaching compositions, see the procedure article Attaching compositions.
Using the BIM Compositions panel
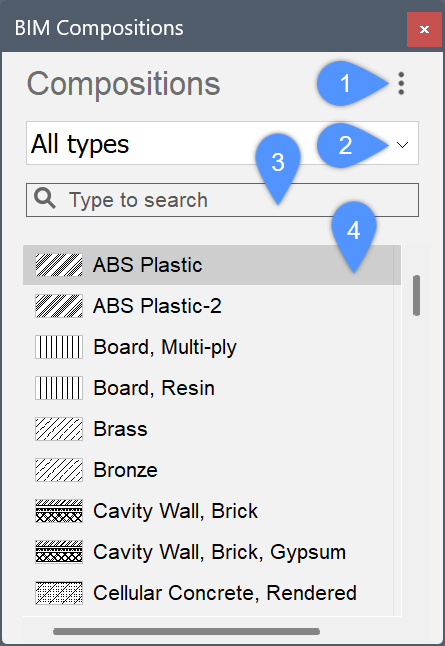
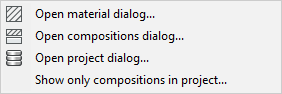
| (1) Menu |
 |
| (2) Composition types list | Filters the list of the compositions. Only compositions of the selected type are displayed.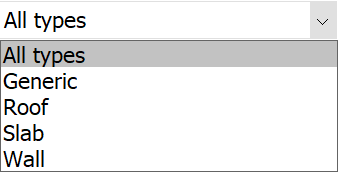 |
| (3) Search field | Filters the list of the compositions. Only compositions that contain the current search term are displayed. |
| (4) Available compositions | All compositions of the selected type are displayed from both the In Central Database and from the In project database, unless the Show only compositions in project... menu option is selected. |
Using the Compositions dialog box
The Compositions dialog box contains options to create, modify and delete compositions. Using the Compositions dialog box, you can also sort the compositions by category and view the properties of the composition.
The BLCOMPOSITIONS command opens the Compositions dialog box:
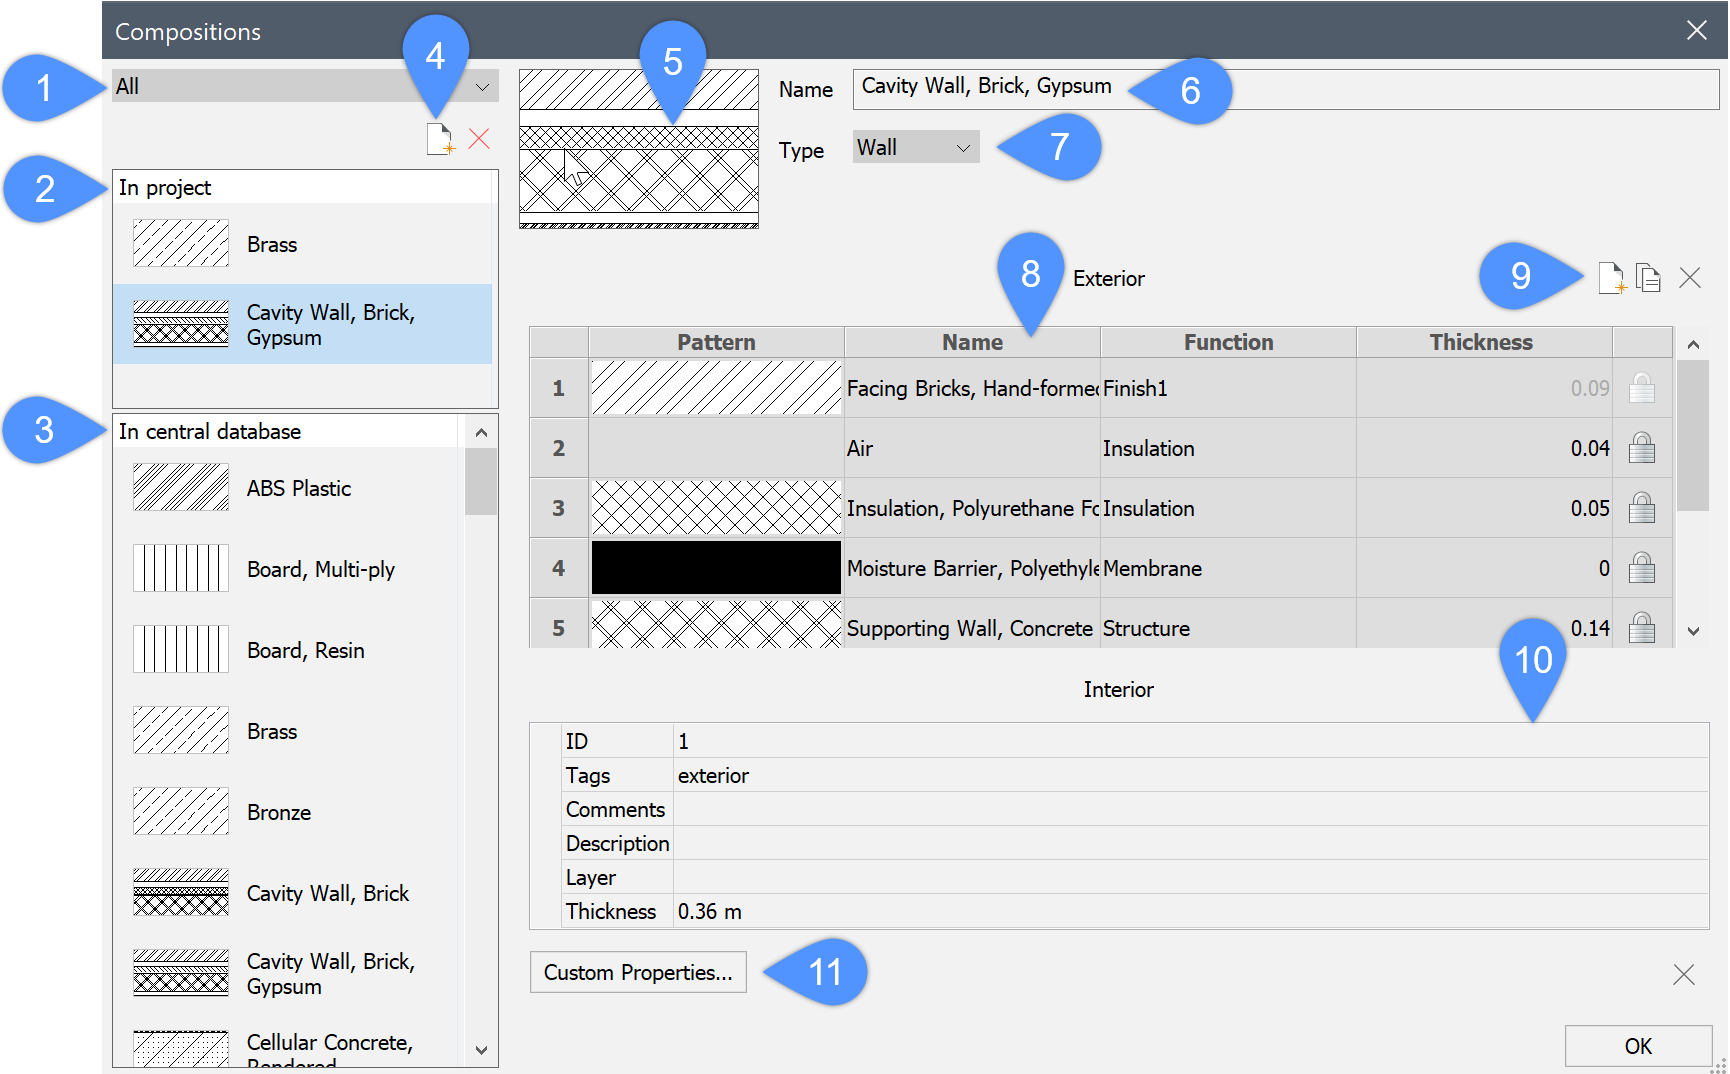
| (1) Composition category selection | Filters by category: Wall, Slab, Roof, or Generic. |
| (2) In project | Displays the compositions of the selected category (wall, slab…) currently used in the project. |
| (3) In Central Database | Displays the compositions of the selected category (wall, slab…) from the Central Database. |
| (4) New composition | Creates a new composition. |
| (5) Preview pane | Displays the currently selected composition. |
| (6) Name field | Displays the selected composition name. You can change the default name. |
| (7) Category drop-down box | Displays a category for the new composition. |
| (8) Structure grid | Displays the material and thickness of the composition plies. The ply on top (exterior) is applied to the reference of the solid. |
| (9) Add ply |  Opens the Physical Materials dialog box which allows you to choose a material from the Central Database or project database. Here you can also create a new material. Opens the Physical Materials dialog box which allows you to choose a material from the Central Database or project database. Here you can also create a new material.
|
| (10) Properties grid | Shows the properties of the selected composition. |
| (11) Custom properties... | Opens the Select/Create a Custom Property dialog box. |
 Inserts a copy of the selected ply.
Creating a new composition
You can create a new composition in either the Project or the Central database using the Compositions dialog box.
- To open the Compositions dialog box, do one of the following:
- Select the Open compositions dialog... in the menu on the BIM Compositions panel.
- Type BLCOMPOSITIONS in the Command line.
- Select a database by clicking a material listed inside.
- Click the New Composition icon () on the left side of the Compositions dialog box.
A new (empty) composition is added to the selected database.
- To add and edit plies, see the Editing a composition section of this article.
Editing a composition
Step 1: Changing name and type
- Select the new composition in the Compositions dialog box.
- Type a new name for the composition in the Name field.
- Use the Type drop-down box to specify the composition type: Wall, Slab, Roof or Generic.
Step 2: Changing the plies
- Adding, editing and deleting plies
- Click the Add Ply button () on the right side of the Compositions dialog box.
The Physical Materials dialog box displays.
- Select a material either in the Project or the Central database and double-click it or press the OK button to assign the material to the composition as a new ply.
- (Optional) Right-click the material and choose Make Composition in the context menu to create a single-ply composition in the selected database.
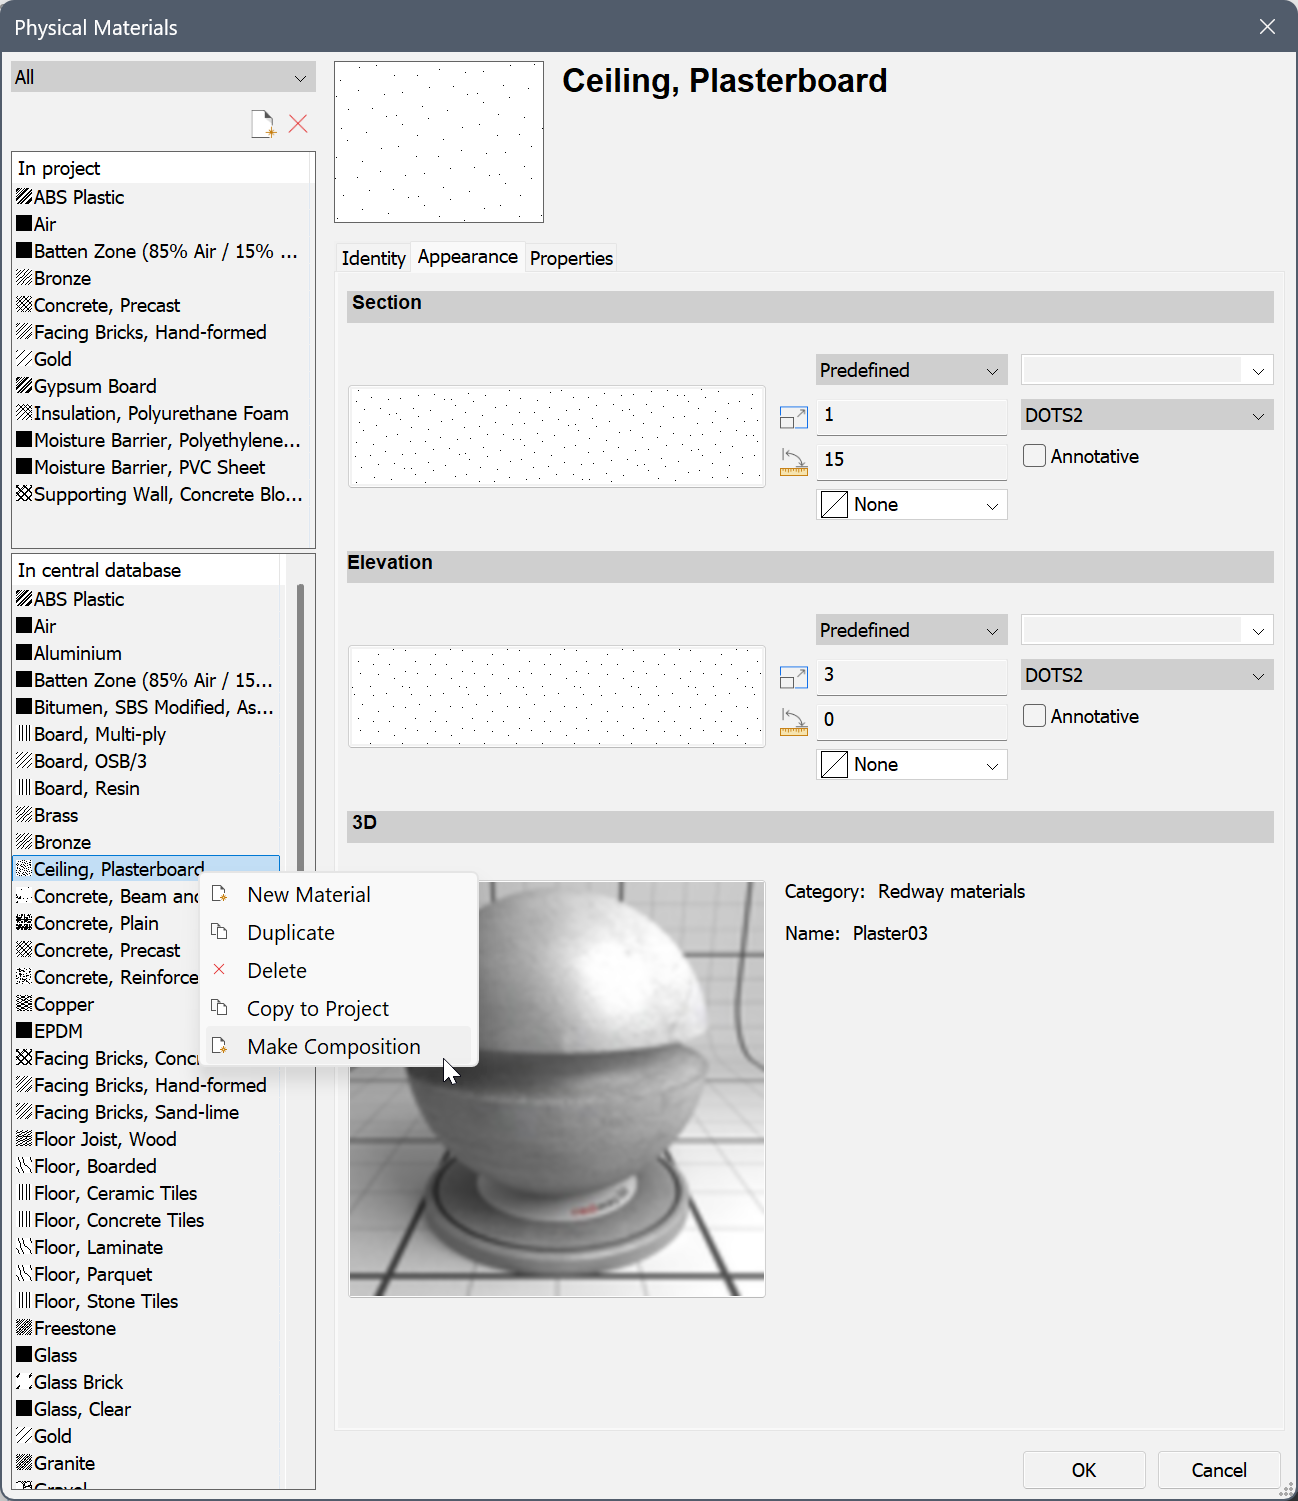
Reopen the Compositions dialog box to see the added composition listed.
- To edit a ply material, double-click the Pattern or Name of the ply in the Structure grid of the Compositions dialog box.
The Physical Materials dialog box displays. See the Physical Materials article for more information.
- To choose another material for a ply, double-click the Pattern or Name of the ply in the Structure grid of the Compositions dialog box.
The Physical Materials dialog box displays. Pick a material in the Central or Project list and press OK.
- To delete a ply, select the ply in the Structure grid of the Compositions dialog box and click the Delete tool button.
- Click the Add Ply button (
- Modifying the thickness and changing the ply order
- Click the Thickness field of a ply in the Structure grid of the Compositions dialog box. Note: You can only modify the ply thickness if the Variable thickness property of the material is set to Yes in the Properties tab of the Physical Materials dialog box.
- Enter a value in the field and press Enter to accept it. The overall thickness of the composition is updated accordingly.
- The plies of a composition are ordered from Exterior (top) to Interior (bottom). Drag the ply number on the desired position to change the ply order.
Note: When a composition has been modified, the solids that have this composition attached are updated automatically. Use the BIMUPDATETHICKNESS command to apply the changes in the model. - Click the Thickness field of a ply in the Structure grid of the Compositions dialog box.
- Locking/unlocking the composition thickness
The overall thickness of a composition is equal to the sum of the thicknesses of the composing plies.
The thickness of a ply can be either locked or unlocked.- Locked thickness: the thickness of the ply is fixed.
- Unlocked thickness: the thickness of the ply is variable.
Note: Only one ply in a composition can have an unlocked thickness. As a result, the total thickness of a composition can be:- Fixed: all plies have locked thicknesses.
- Minimal: the composition contains at least two plies and one ply has an unlocked thickness. The minimum thickness is equal to the sum of the thicknesses of the locked plies.
- Free: a single ply composition has an unlocked thickness.
To lock/unlock the thickness of a ply, click the icon on the right side of the Thickness field in the Structure grid.
Note: The thickness of a ply can only be unlocked if the Variable thickness property of the material is set to Yes in the Properties tab of the Physical Materials dialog box. - Adding Tags
- Select the Tags field in the Properties grid of the Compositions dialog box.
- Type the tags, separated by commas. Tags are case sensitive.
- Click the Browse button (
 ) next to the Tags field in the Compositions dialog box to open the Tags dialog box.
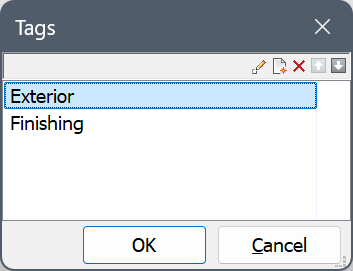
- Click the New Item button (
 ) to add a new tag at the bottom of the list.
 - Select a tag in the list and click a tool button:
- Click the OK button to save the changes.


Step 3: Creating new materials
You can create new materials from scratch or copy them from an existing material. See the Physical Materials article for more details.
Displaying compositions
Whether the various plies of a composition show in the 3D model is controlled through the LEVELOFDETAIL system variable. The RENDERCOMPOSITIONMATERIAL system variable controls whether the ply material is rendered or not.
- Level of Detail:

- Render Composition Material:

When LEVELOFDETAIL system variable is 0, the major faces of a solid are rendered using the material of the outside plies. The minor faces (for example top, bottom, start and end face of a wall) are rendered using the material of the exterior ply.
Copying compositions
You can use the following procedure in both the BIM Compositions panel and the Compositions dialog box:
- Select the composition(s) in the source database. Press and hold the Ctrl key to select multiple compositions.
- Do one of the following:
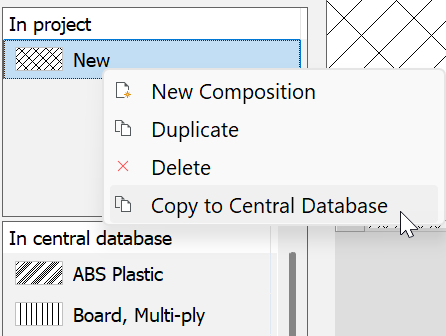
- Drag the selection to the other database.
- Right-click and choose Copy to Central Database or Copy to Project in the context menu.
A dialog box displays if the composition already exists in the target database:

You can choose to skip, overwrite or rename existing compositions. Duplicated compositions have an index number added to their name.
(Optional) Check the Don't show this message again for this operation option.
Deleting compositions
- Select the compositions in the In Project or In Central Database list on the BIM Compositions panel or the Compositions dialog box.
- Do one of the following:
- Right-click and choose Delete in the context menu.
- Click the Delete button (Compositions dialog box only).